Tampilkan postingan dengan label holidays. Tampilkan semua postingan

Rabu, 27 April 2011

Bits and Bobs and More Daily Cuteness

More on the Knitted Royal Wedding from Yorkshire via the BBC ... HERE. I'm dragging myself out of bed at 4 a.m. to watch the festivities on Friday while breakfasting on blueberrry oat scones and Yorkshire Gold Tea.

While we here in the States don't have royalty, we do have Lady Liberty. Julia, Mom and I went last week to visit her. It was an awesome day. I had never seen her up close and she is breath-taking, as is her story via Ken Burns and PBS which I watched a while ago. Look it up - it is worth a watch. Fun ferry ride and trip to Ellis Island too. If you have never been to either, I highly recommend the day. Make sure you do the Audio add-on as it is so interesting!

Rabu, 22 Desember 2010

Christmas is Closing In + a New Website for You

I'm in the throws of printing calendars from my PDF Downloads that are available for sale here on this blog. Just mentioning in case you are desperate for a present, can't get out and have a decent printer and some time to spend printing and doing a little hole punching.

In between ordering print-runs and ordering them, I started looking for a website I heard about when I was at Stitches East. It is Alexis' current project (as in Publisher and Photographer Alexis from Knitters' Mag). All I can say is I am totally blown away. Go on over and take a peak at Crechemania.com!

There are plenty of things to keep you busy on Christmas afternoon (and some for free!).

Great job Alexis! Merry, Merry to all of you!

Jumat, 10 Desember 2010

Elves, Gnomes, Wizards, Trolls, Santa + Leo Tolstoy - A New FREE Pattern for Holiday Knitting from Kristin to YOU!

I've been busy as a little elf. And what have I been making?


Another Christmas Gift from me to you!

Grab your No. 10 needles, your odds and ends of Julia (or any feltable worsted weight wool) and go! Knit in the round, the little guys begin with i-cord and then are worked completely in the round. I felted them in my washing machine and then embroidered the eyes and noses. For the beards, I used raw washed wool from our sheep. If you don't have any handy, use a thick single ply (like Lopi) and unspin the yarn to turn it back into fluffy fiber.

Now these might look like Christmas ornaments (which is what they started as) but after living with them and photographing them, I decided that they have all-season appeal. Perfect little finger puppets for Harry Potter and wizard fans. They make awesome toppers for a wine bottle that you are bringing along to a dinner date, don't you think?


Call them what you may - elves, trolls, gnomes, Santas.... But while I was making them, I watched the movie The Last Station with Helen Mirren and Christopher Plummer. Do you know what? The little guys started looking just like Leo Tolstoy to me.

Here's Christopher as Leo.... You see? Don't they look just like him?


So there you have it - Little Leo Tolstoys, Santas, elves, or whatever for you and yours! You've still got time before the holidays to whip up a few! From me to you. Have fun! And Happy Holidays to YOU ALL!

Available through Ravelry here for members.
For all of you who are not Ravelry members, click on the Download Now link below!


download now

Crazy Cute Cards for Knitters Available Here on Kristin's Blog


The perfect gift for the knitter on your list - Kristin's Lambs in Sweaters. Or to send to your knitting friends - my Merry Knitmas card. Read all about them and order here.

For all you locals, my family and I will be selling our Leyden Glen Lamb, my holiday cards, and books at the Amherst Winter Farmer's Market at the Amherst Middle School from 10 a.m. to 2 p.m on Saturday the 11th. Stop by to pick up a leg of lamb for your holiday feast and to save shipping charges on cards and books! It is a great market with all kinds of local produce, meat, greens, and more. Music too!

Senin, 29 November 2010

It's Over Once Again....

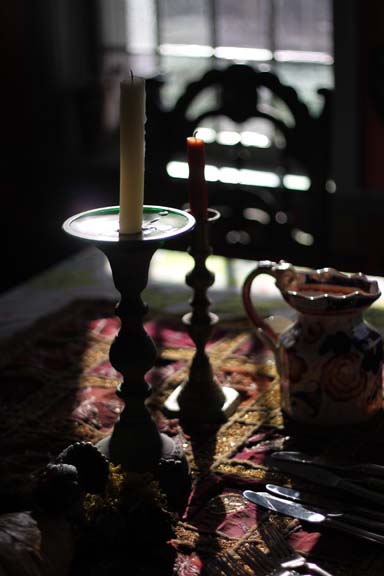
Our house is unbelievably quiet considering the commotion of the Thanksgiving Holiday. We had 21 people for dinner and the day and a few for a few nights. We don't entertain too much so I always look forward to hosting my family for one holiday - just once a year. Like many old houses, we have an official dining room complete with my Aunt Jennie's dining set - a big old table, two sideboards, lots of chairs, a chandelier that burns candles and lots of dishes and tableware which were mostly wedding gifts back a few decades ago. I painted the dining room walls with a fanciful vine, flower and animal mural which was so much fun to do and still looks good. Boy, I had a whole bunch of energy back then - now that I think back on it!


For my centerpiece, I purchased a "bread cornucopia" from our friends at 7 South Bakery in Bernardston. If I am lucky, it will last until next year - that is if the mice don't discover it this winter.


As Mom and I were cooking, we were talking about all the stuff brides get when they register for wedding gifts and how sad it is it never gets used but once a year - at least in this house. We were also talking about how times have changed since I got married back in 1984. Does anyone even buy good china or sterling silver anymore? I'm thinking no but maybe some still do. All that stuff that used to seem so important to brides - do they even care anymore?


The normal life of our dining room is a catch-all that I close the door on a lot. I use the giant table as my shipping surface. Normally, there are boxes of books and cards, packing tape, and shipping boxes scattered on every surface. During Farmer's Market season, we keep all our rotating supplies in there too. What about your dining room? Do you even have one? What do you use it for? Do you have Sunday dinner every week like we used to when I grew up? Do you throw fancy dinner parties? Do you cut out quilts on your dining room table?

Now we're back to just the three of us and assorted felines and canines. The critters are definitely happy to have their house back to normal.


It is back to real life and looking forward to the Christmas holidays - especially Julia. It is Christmas music non-stop, every minute she is home. Seeing her as excited as she is reminds me of how much I loved Christmas as a young girl. Oh, the anticipation! Our dining room will be waiting again for another year for its really big day! Good week everyone!

Kamis, 25 November 2010

Happy Thanksgiving

As Americans throughout our continent and throughout our world celebrate Thanksgiving, I wish you and yours, the very yummiest of days. As a Thanksgiving tradition at our dinner table, we go around the entire table and everyone, young or old, shares with the rest of the family what they are thankful for. It is always a lot of fun - some of our family members' thoughts are very serious and some are very funny. I especially love to hear what the kids have to say.

So today, on the morning of Thanksgiving, I want to say to you all that I am incredibly thankful for all of you out there who encourage me by reading and commenting on my blog. This blog has become a very special part of my life - way more important to me than I every thought it would or could become. You all give me a reason to remain motivated to create new projects, develop new knitting and stitching patterns, and to compile and write books. You all are helping to support our farm and for that my family and I are very grateful. Many of you have participated in our "Getting Stitched On The Farm Classes" which is really a dream come true for me. To put it out there in the universe and to actually have knitters come to our farm is something I never could have imagined would ever happen here when we bought this old farmhouse and abandoned orchard back in 1998.

Through this blog, I have stretched my artistic boundaries. You have encouraged my photography immensely - another thing that I could never have envisioned happening. Never before would I have taken the time to walk around for hours through the fields and along our road capturing the little bits of beauty before me. Never would I have thought so much about how much nature inspires my sense of color - nor documented it so often.


For those of you who often write to me for advice on how to begin a career in knitwear, (or for those who are itching to write but perhaps can't find the time) - all I can say is "just do it." You never know until you try what failure or success you will have -- but you will learn something none the less.

And so Happy Thanksgiving to you all. Our best from all of us at Leyden Glen Farm for a wonderful day!

Rabu, 24 November 2010

Turnips for Thanksgiving

Tomorrow we are having 21 people for Thanksgiving - most of them family but we have added a few friends to the mix. I love Thanksgiving and our farm is the perfect place to celebrate. We make it an old-fashioned day - taking a hayride through the hills and then eating, eating, and eating some more. My sister Lynn and my Mom have been here helping to get ready but as usual, we are doing more talking than anything. Tonight we'll be cooking up a storm in preparation for the big day.

I love the Thanksgiving Holiday more than any other. No pressure except for a lot of cooking which I don't mind at all. I always make turnips for Thanksgiving. It began when I asked The Farmer what his family traditionally ate for Thanksgiving and what he would really miss, knowing my family's culinary traditions. He said "turnips." I was stymied because I had never, ever eaten a turnip - never at all. I told my Mom on one of our first married Thanksgivings when we would brave the hoards of other people heading to New Jersey to celebrate with family. (Thank goodness we don't do that anymore!) She said "okay - you make them." That led me on one of my culinary adventures which continues to this day.

When we moved to the farm and I started to become more interested in sourcing local food and growing it, I discovered something called the "Gilfeather Turnip." I grew them a few times, getting the seeds from somewhere that I can't remember. Now I get my Gilfeathers from my friends at Coyote Hill Farm. I don't know what the difference really is in the taste of the Gilfeathers but whenever I cook them, everyone loves them. It should be noted that many vegetable farmers around here are now also growing a quick maturing turnip which they call "salad turnips." These are sliced and eaten raw in the spring and early summer.

Thus to the purpose of this post. My sister Laurie suggested I write about turnips. My whole family has come to look forward to eating them once a year but everyone is perplexed at how to cook them and what kind to buy. Tomorrow, we're going to have a little turnip tasting to see which variety wins. Here's the selection of turnips I am cooking.

From left to right: Two Gilfeather turnips, one "Purple Top", One Cape Turnip, and The Farmer's favorite Rutabaga (these are the ones covered with wax that you commonly see at grocery stores and are also known as swedes or yellow turnips)


How I cook them?
1. Peel them.
2. Cut them into chunks about 1". Peel 2 apples and core. Cut the apples into slices.
3. Boil the turnips and apples until soft.
4. Mash them and add a generous amount of butter, salt and pepper.
That's it - what could be easier?

I have also made Mario Batali's Turnip Risotto which I found in one of his cookbooks. Always on the look out for a new way to cook turnips, I was wary of this one. But my oh my - it is awesome. I will try to do this recipe again during December now that the days are short and I have more time to cook. Trolling the web, these special Gilfeather recipes also look like they should be on my list to try! But they don't have the correct photo of "Gilfeathers" at the top of the page - those are just common purple top turnips.

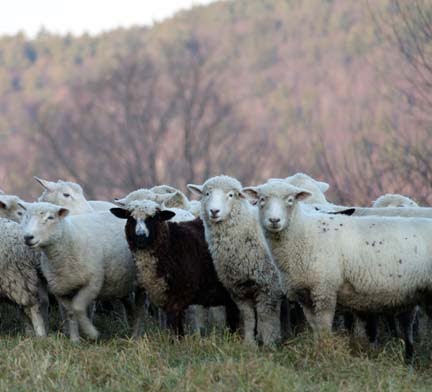
Purple top turnips are commonly used for livestock feed. The Farmer is always talking about growing a field of turnips for the sheep although we have yet to get there yet. Here you can read about how important turnips are for sheep feed in the UK when the grass has stopped growing. I am pretty sure farmers in the west grow turnips to graze their sheep on in the fall.

I hope you all have a very Happy Thanksgiving, wherever you live.

Minggu, 31 Oktober 2010

All Hallow's Eve

For all of you out there (especially the knitters), check this out. Thanks to my friend Nancy K. in Minnesota for sending the link my way! Incredible!

As we were greeted in a restaurant en France when we were on vacation ages and ages and ages ago ......

" 'appy 'al-o-wen!"

I will never forget those faces, nor the mystery of what the heck they were saying to us. We did figure it out....

I'll be at Stitches in Hartford at the Westminster booth until sometime in the afternoon. Trick or Treating tomorrow night so must rush back to the farm for Julia. It has been a great show so far. I met tons and tons of wonderful, enthusiastic knitters on Saturday. Stop by and say hi if you come. There are lots of lovely yarns, books and fibers to buy! Or just to look at......
Don't forget to enter the October Giveaway #4. Scroll down and you'll see it. The deadline is November 2nd so you still have a couple days.

Minggu, 04 April 2010

Hoppy Easter To You

From the Blue Bunny.......


From the Pink Bunny.....


A Happy Easter to all of you out there in Bunny Land!

From All of Us Here at the Farm.

Selasa, 09 Februari 2010

Quick Embroidered Hearts and Some Lovely Knitting

++I love to do embroidery - it is quick and beautiful and really relaxing. Something, anything, that is hand-embroidered is a really special present for anyone. I've made heart pillows, heart sachets, heart themed pillowcases and I've even knit hearts. Here are a few embroidered heart ideas which may inspire you to stitch a heart for someone special this weekend.

This heart pillow is a project from my book Colorful Stitchery.


I made these hearts for Julia's teachers one Christmas. I stuffed them with lavender and put a little tie on them to hang them on their Christmas trees.


My Mom, sisters and I made these lavender filled sachets for my sister Jenn's weddiing shower guests last fall.


I made my sister Jenn and her husband linen pillowcases with embroidered hearts on the edge. Here's a close-up of the heart.


I made Julia this heart pillow out of recycled blankets. The heart shapes were cut out of different color wool fabrics and then stitched onto the green background. The vertical lines are done in feather stitch.


Make a heart today.

I had to share a project that Deborah from Minnesotat is making. She teaches a class at All About Yarn. The class project is my "Very Long Scarf" from Color by Kristin. The class is so popular, they have added a second one. Here's Deborah's version of my scarf. Isn't it beautiful? You can check out their website for a different view. It is so much fun to see what people do with my patterns - especially exciting when they mix up the colors. Nice job Deborah!


Lynn H from ColorJoy in Minnesotat is doing a great job on The Mother/Daughter Mittens. She is changing them into fingerless gloves. Check that out here.

I also want to thank Carol S. from Go Knit in Your Hat for the thorough and wonderful "no bull" book review of Color by Kristin. You can check that out here.

Doesn't all this knitting and stitching with color get you through the winter?
For all you wondering, we didn't get an inch of snow this past weekend. Hoping for a bit of the white stuff tomorrow. Our ground is bare and brown and quite ugly looking.

p.s. You can buy signed copies of my books Colorful Stitchery and Color by Kristin on my website here.

Jumat, 25 Desember 2009

Merry Christmas 2009


May your holiday be filled with sugar and spice and everything nice. My family and I wish you the happiest of Christmases.

Sabtu, 12 Desember 2009

All about Pink Today

The other day I wrote about Julia's pink obsession. It was so much fun to hear about all the other girls and women out there who love or hate pink. It seems that every time I write a post about color, I get some really great comments. Color is such an important part of my life and so many other knitters, stitchers, quilters, and artists. It is great to be passionate about color because it just makes life so much more fun!

The other day, a couple of my good friends came over for our annual "build little birch houses" party. Let's just say it is now an annual event. Last year, on the day we were having our first "birch house holiday party" we had a massive snowstorm. After digging Clara's car out of the snowbank and having our neighbor Jason tow her up the hill, Kay decided to go home. Our first party was an event in its own. This year, the snow stayed away and we spent the afternoon covering little boxes with natural stuff. It was a great way to kick off the holiday season.


Julia wanted her house to be pink! What a surprise. Here's the house I made her which she glittered away in pink, pink, and more pink. (This isn't the easiest project for little kids - all the cutting and fitting of the birch bark is quite tedious.) I think the pink is beginning to grow on me!


And so to continue the Pink Talk, here's a project I've been knitting for Julia as a Christmas gift. The pattern is The Family of Slipper Socks from my new book Color by Kristin. Julia has been hinting that she'd like a pair. I knew they had to be pink or pink themed. I dug through my knitting bag and pulled out a bunch of pinkish Julia Yarn. Then I combined it with pink and magenta's complement (on the color wheel) green.


I just love complementary color combinations. I use them all the time in my work. Although many people find them garish, I think they are just so much fun! Think pink zinnias against their green leaves or magenta cosmos - just beautiful and so cheerful. Just what I want to knit on a snowy day in the midst of winter.

So here they are. I used lots of colors for the garter section. I kept mixing pink and green shades into the garter stitch. To avoid having all the ends on one side of the slipper, I used circular needles and kept slipping the work back in forth. Sometimes the garter stitch was regular Knit 2 rows. And sometimes it was Purl 2 rows. Get it?


Oh, wow, and all those ends to weave in, you say? I don't mind at all. I keep them by the telephone with a tapestry needle and weave in while I talk. It goes fast and the result is so pretty.


Here's the inside of the work.


And here is the outer side of the work.


I'll finish them up and post another photo next week once I get the edging on them.

There's still time to ship books before Christmas! Once again, I'll gladly sign them to you or a loved one. Hop on over to the shop, if you are interested.

Happy Weekend Everyone.

Kamis, 26 November 2009

Thanksgiving Day 2009

From our flock......

to yours.....

may you enjoy a lovely Thanksgiving Day wherever you are.


Thank you to all of you for reading and sharing in our lives on the farm and your lives hither and yon.

Minggu, 22 November 2009

Crafty Ideas for Thanksgiving Weekend


Our farmhouse is the site for the annual Nicholas Thanksgiving Feast. As many Nicholas-related family members as can get here come and we celebrate my favorite holiday by eating, walking, and taking an old-fashioned hayride. I cook the turkeys and everyone else contributes one of their specialties. The worst part for me is cleaning the house before they all arrive!

The day after Thanksgiving, my sisters, Mom, the brother-in-laws and all the cousins descend upon my sister Nancy's house in New Hampshire. We spend the day eating left-over turkey, taking walks, talking, laughing, and doing a craft project together. Last year, we all sat around making little birch houses.

I loved seeing the spin all the kids put on it. It truly was a day to remember, as every holiday is. This year, my sister Laurie has something up her sleeve for us to make. Can't wait to see it! Last year I did a Tutorial on My Birch Houses which you can find here. Maybe your family will make a Birch Cottage on the day after Thanksgiving. You'd better get collecting natural materials soon!


FYI - the glittery animals are just made by applying glue and glitter to little plastic animals you can find at kids toy stores.

Kamis, 04 Desember 2008

Winter Holiday Birch House Tutorial

Last year, the month before Christmas, I went slightly craft crazy and made a little birch village full of houses, barns and glittered animals. It was really fun to do – even if there was glitter for months to come all over the house. The best thing was it was an incredibly inexpensive project. I only had to buy crystal clear glitter and had everything else hanging around the house. The people I gave them to loved them with a capital "L."

My family and I have a Thanksgiving tradition. After we eat the turkey at our farmhouse on Thursday, we spend the Friday after Thanksgiving at my sister Nancy’s house in New Hampshire. Quite a while back, we started doing a craft or two on that day, besides eating the leftover turkey in sandwiches. This tradition has become really fun for all of us. Noone stresses over the meals – it’s all leftovers. My mom, sisters and I and all the cousins sit around Nancy’s dining room table and make something. It is probably one of the favorite days of the year for all of us.

This year I suggested my little birch houses. Everyone said it sounded good and so we all collected the supplies we needed and brought it to Nancy’s.
The project was such a success – especially with the teenage girls – that I thought it would be a great tutorial to share with all of you.

So here you go – get busy and make up your own little winter wonderland holiday village.


Here’s what you will need:

1. Recycled cardboard boxes of all shapes and sizes.
Scour your closets and pantry for all different kinds – toothpaste, pasta, Kleenex, candy – anything goes but remember that the size of your box determines the finished size of your project. If you don’t have much storage space, I suggest a very small box like a toothpaste box.
2. Some recycled cardboard in flat sheets for the roof – soda and beer case boxes are good, as are back pages of notepads.

3. Birch bark – check the sides of the roads for fallen rotting birch logs. Peel the bark off and let it dry. If you don’t live where birch trees grow, you can order birch bark on the internet. (Does anyone have experience ordering with a specific company?)
FYI - this is a great winter activity for everyone - Julia and I had a great time driving around looking in the woods for birch logs. She did a great job peeling the bark off the rotting trees.
4. Hot temp glue gun
5. Elmer’s glue and a paintbrush for application

6. Pine cones – big and little

7. Sturdy clippers for cutting the pine cones apart

8. Little bits of greenery such as white pine, princess pine. Try to find sturdy greenery – for instance, hemlock drops too quick so avoid that. Fake greenery would work too although I'm not a fan of it.

9. Scissors that you don’t mind messing up.

10. Crystal Clear Glitter

Step 1:
Fold the boxes flat and cut to the desire size you want your house to be. For instance, I cut this butter box in half. I will make 2 houses out of it. After you cut the box, glue the bottom back together so it stands up sturdy again.

Remember that a big house will take longer and use up more supplies. The older cousins made some huge houses and sat there for hours gluing them all together. If you want to make a bunch of these for gifts, go for smallish boxes and houses.


2. Cut 2 triangular pieces of cardboard for the trusses that will hold up the roof. Hot glue them to opposite sides of the box.


3. Cut out your roof out of another piece of cardboard. For mine, I used the natural folds in the cracker box for the peak. I laid it on my house and eyeballed. You can trim it down in size later. Do not glue it to the box.


4. Gather your birch bark. It is very interesting material. The different layers of the bark split to reveal papery sublayers. The outside is the classic grey birch color. The inside layers are a lovely tannish shade with stripes. The innermost layers on rotted trees is a very dark brown. All these colors give you lots of possibilities.


5. Using hot glue, cover your box with birch bark. Trim to the box shape as it dries. I used the tan color for my houses.

Then cover the roof with the grey outer layers of bark. Here is it fun to use the natural rotted edges for texture and layer different pieces on top of each other.


6. Using hot glue, attach the roof to the bottom of the house by applying hot glue to the trusses. Hold it until it is dry.

7. Cut some of the inner bark which is dark brown into doors and windows. Hot glue them on the house.

8. Clean your workspace of all the brown, shaggy bits. It is time to glitter.

Use craft glue and a paintbrush. Paint the roof with the glue. Then paint the windows. Apply the glitter to the roof, windows, and doors. Shake off the excess. The fallen glitter will now be a bit dirty. Keep it in a separate container and you can use it again for more of the same project.


8. Using hot glue, attach the pine cones and bits of greenery to the sides of the house.

Using craft glue apply some glitter to the pinecones too to make them look loaded with snow.

9. Decorate the peak of the roof. Using strong clippers, cut apart a large pine cone. Use the single pine cone pieces for the peak. Hot glue them, overlapping as you go.


Here's what the roof will look like.

Glitter the roof trim.

You can use your imagination for other roof trims. Last year I used lichen, moss, and silvery pipecleaners to decorate the peak. It's up to you and what you find in the woods.

That's it - you are done. You can glue a piece of paper over the bottom of the box and write a message on it. Don't forget to sign and date the box so when you take it out in 20 years, you'll remember way back when.


What cute little homemade decorations, don't you think? Build your own little village. I'm adding to mine this year with some more little buildings. Wouldnt it be fun to make an exact replica of your own house?

A little FYI. Kids under 11 or so really need help with the project. The hot glue and all the trimming is tricky. My nieces Camille (almost 13), Celia (15) and Olivia (16) really went to town with this project. I called the day after and they were still building houses. What fun!